Like many people, you have a huge collection of Blu-Rays and DVDs. Maybe they’re all lined up nicely on shelves somewhere, or maybe they’re scattered around your place near various displays.
Because they’re physical media, you can’t just watch them whenever and wherever you want – on a tablet or phone for instance. You paid for the content, but how do you watch it on your iPad? What if you have a new DLNA-ready TV, but don’t want to shell for another Blu-Ray player? Maybe you’ve run out of inputs on your older display or it doesn’t support HDMI’s “consumer-experience-improving” DRM.
Fear not dear reader, for this guide (in 3 parts) will walk you through the process of extracting the movie data from your optical collection and storing it in a format you can use on any device, all while maintaining excellent quality.
And the best part? All the software you need is (currently) free, and works on Windows or Mac.
What you are going to need is an optical drive connected to a computer. Obviously to rip Blu Ray movies, you need a Blu-Ray drive in your computer (or hooked up via USB). My local retailer sells them for $45.
Legal Disclaimer: Depending on your location, simply bypassing the encryption on your own media could be illegal. In most of the civilized world, it’s safe to do this as long as you’re using it for yourself and do not start handing around copies of the ripped data. So if you rip James Bond and upload an MKV via torrent or usenet, don’t be surprised when the MAFIAA sends it’s goons to haul you off to solitary.
Hardware
As mentioned above, you’ll need some kind of home computer with an optical drive that can read the discs you want to rip. Specs aren’t that important, but a very old old or slow machine will be painfully sloth-like for ripping Blu-Ray discs. Also keep in mind that you need a lot of hard drive space available: for the rip and subsequent re-encode, I’d earmark 100GB temp storage space per Blu-Ray disc, especially if that movie has foreign-language subtitles (covered in a later installment).
Software
At bare minimum, you’re going to need one piece of software to rip the movie from the disc to your hard drive. We strongly recommend MakeMKV, as it is currently free (in seemingly perpetual beta), saves a step or two over other options, and it’s managed to successfully decode every Blu-Ray we’ve thrown at it.
The only other software that competes is SlySoft’s AnyDVD HD. It works, but it takes a few extra steps, and it will run you about $150 CDN for a lifetime license.
As of writing, MakeMKV is in version 1.7.10. The functionality only lasts 30 days, so you’ll need to either uninstall/reinstall, which takes 2 minutes, or upgrade your key which tends to be posted on their forums. If you plan to make a lot of use of the software, be kind and support the developer. At $65 CDN it’s still much cheaper the alternatives.
UPDATE: For MakeMKV 1.7.10 to work, you’ll have to enter a registration code (it will get you through to end of Jan for starters). Start MakeMKV, go to Help->Register and type in the code you find here.
In part 2 of this guide, we’ll explore encoding the ripped files and the software that is available for that complex task. Part 3 covers both the server-side software for streaming and also DLNA playback to portable and embedded devices.
Down to Business
You’ve got the software, so let’s let ‘er rip! (ha ha). Our examples here are shown in Windows. You will find them applicable to Mac and Linux versions as well. We’ll also assume you’re ripping a Blu-Ray, though the process is similar for DVDs.
NOTE: The steps below will provide you with a lossless MKV copy of what’s on the disc. The file will be huge, but still playable on many devices. Remember, MKV handles multiple video and audio streams as well as multiple regional and forced subtitles, so it is absolutely the best first step for ripping the raw, unencrypted data. Re-encoding for smaller more portable files is explained in Part 2 of this guide.
Drop the BD (Blu-Ray Disc) in your optical drive and let it spin up. If something wants to read or access the disc (like PowerDVD), be sure to close it.
Now fire up MakeMKV and it will have a quick look at the disc. You should see something like this:
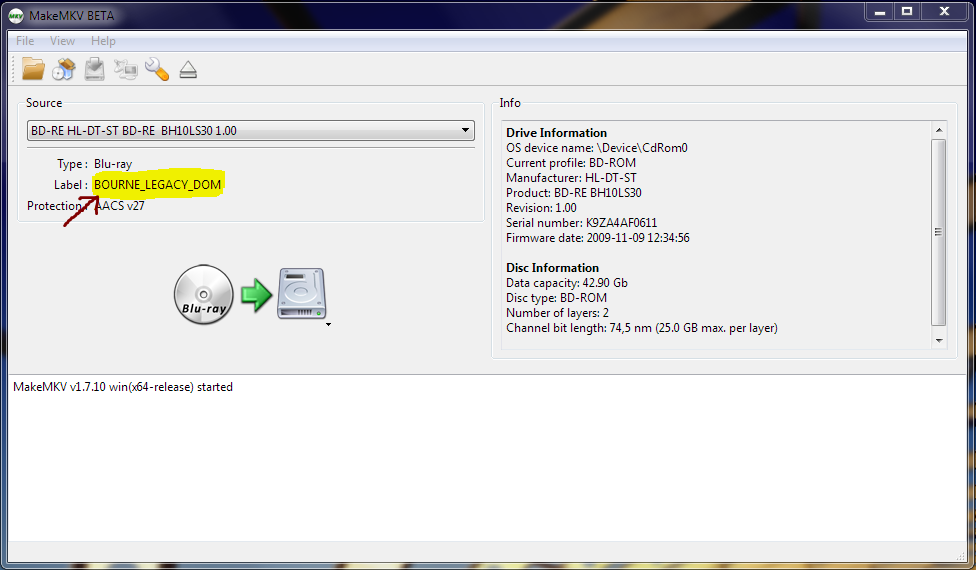
The main MakeMKV screen at boot. If you have a movie disc inserted in your reader, the title should show up in the highlighted area.
Notice that the name of the movie will show up if everything’s working (though the name may look cryptic). The big friendly graphic in the middle of the screen is actually a button, so click on that.
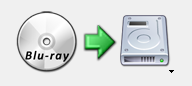
Click this to start initial read of the disc.
MakeMKV will start by decrypting the data, then it will parse out the main contents of the disc and present them in an expandable check-box list for you.
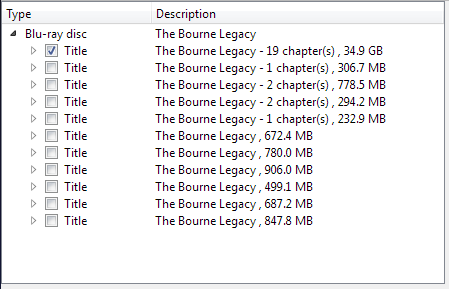
The biggest file is usually the one you want.
One of these options should be conspicuous by size – it’s almost always the largest file you want to select. Some movies ship with multiple angles or HUGE extras on the disc, so use your noggin when deciding what to save.
Now click the little traingle-shaped arrow to the left of your checkbox and the list will expand to give you even more options.
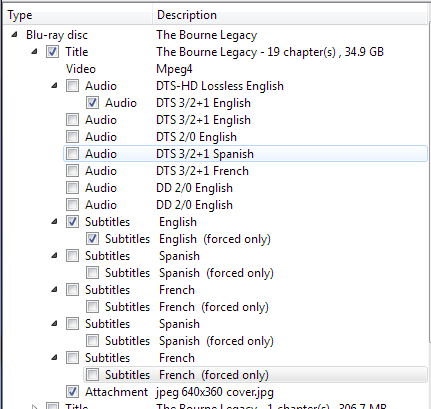
Pick the elements you want to rip. Selecting them all will make for a huge file, so we recommend only checking off what you’ll actually use. Captions are your enemy: see instructions below.
The step shown above is where you have to pick which video, audio and subtitle tracks you want to include in your initial, lossless MKV rip of the movie. To avoid unnecessary bloat (large files) we recommend only selecting what you’re actually going to use. Grab the main title and the DTS audio track. You can also rip the lossless DTS-HD audio, but that format will cause playback problems on many devices (see Part 2: Encoding).
In the world of Blu-Ray, subtitles are a real pain. If you’ve already watched the move and know for sure there are no necessary subtitles (ie foreign language/alien scenes), then feel free to leave them out. Most readers here are going to be ripping English-language movies with native English audio tracks – this means you only want those subtitles that show up when someone is not speaking English. If this is the case, select everything under “Subtitles” that has the word “English” next to it, and we’ll sort it out during the re-encode step. If you’re playing back this raw MKV, it should be easy to select the subtitle track you want in your player.
Note that if you plan to use this raw MKV long term as your main playback source, and you don’t want subtitles all the way through (they can get annoying) you should uncheck the “Subtitles English” box and leave only the “Subtitles English (forced only)” box selected. This will make the English text pop up when you need it but otherwise it will be hidden.

Select your destination and fire at will (not Will).
Make sure your selected “Output Folder” has enough space, then click the “Make MKV” button at the top right. Grab a coffee as this can take some time depending on your bus speed, your hard drive and your optical drive.
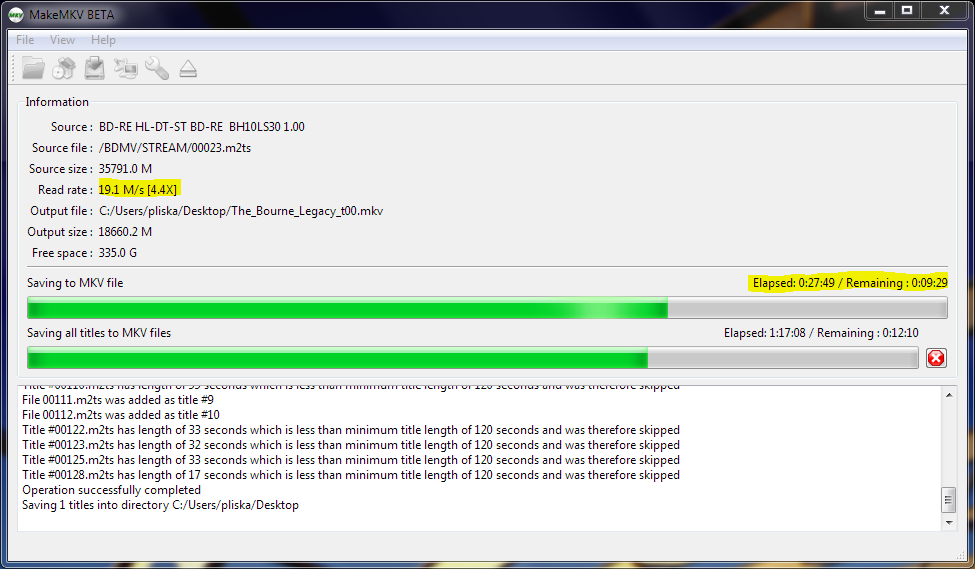
The actual rip-to-MKV process will take some time.
My old junker BD-RW will take about 40 minutes to rip a full movie. Newer readers can cut that to about 10 minutes or even less.
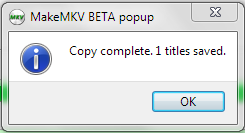
This means it worked. Well, it means it ripped what you selected.
If all goes well, you’ll find the finished file in your selected output folder. Rename as you wish, and it’s ready for playback! If your computer doesn’t like MKV files, try installing something like the K-Lite codec pack or the excellent VLC player.
Ah, that satisfying moment of success.
Congratulations, you did it! Tune in later in the week for Part 2 where we’ll guide you through the mystical and ancient voodoo magic of video encoding. This will give you smaller files that will play on a wider variety of devices, and even over your home wireless without stuttering. Part 3 will help you setup a media server and tech you how to stream the fruits of your labour to DLNA devices like the WD TV Live, and also your Android, iOS and Windows (including mobile) devices.
Feel free to leave your questions in the comments section, and we’ll do what we can to help out.